What's New in the ML.NET CLI

The ML.NET CLI has gotten some interesting updates. This post will go over the main items that are new.

For a video version of this post, check below.

New Install Name

The first thing to make note of is that there is a new name when installing the newer versions of the ML.NET CLI. Since the file size got too big for a single .NET tool, it is now split up into multiple installs depending on what operating system and CPU architecture you're running.

So getting the newest version will require a new install even if you have the older version installed. Actually, I would recommend to go ahead and uninstall the older version of the CLI if you already have it installed. This can be done with the dotnet tool uninstall mlnet --global command.

So depending on your machine is what you will install. I have a M1 MacBook Pro, so I would install the mlnet-osx-arm version. If you're on Windows, you will probably be installing the mlnet-win-x64 version.

If you want to update a previously installed newer version, you can use the dotnet tool update command.

Train with a mbconfig File

With the new CLI release, it comes with a couple of new command. The first we'll go over is the train command. This takes in a single required argument, which is a mbconfig file. This will use the information in the mbconfig file and will perform another training run.

This can be good for a few scenarios, including continuous integration where the mbconfig file is checked into version control and can be run each day to see if a new model can be discovered.

Forecasting

Along with the train command a new scenario has been added - forecasting. Forecasting is primarily used for time series data to forecast values in the future. Similar to the other scenarios, we have a few arguments we can pass in.

The dataset and label-col arguments are similar to the other scenarios, but forecasting has a couple of others that are required - horizon and time-col .

The horizon argument is simply the number of items in the future you want the forecasting algorithm to predict.

The time-col argument is just the column that has the time or dates that the algorithm can use.

And we can run this like other scenarios with the below command. We'll let it run only for 10 seconds with the --train-time argument. The data can be found here if you want to run it as well.

mlnet forecasting --dataset C:/dev/wind_gen.txt --horizon 3 --label-col 1 --time-col 0 --train-time 10


A couple of big additions to the CLI and I'm sure more are coming. It is nice to see that the ML.NET team is continuing to keep the CLI's features on par with Model Builder.

The ML.NET Deep Learning Plans

One of the most requested features for ML.NET is the ability to create neural networks models from scratch to perform deep learning in ML.NET. The ML.NET team has taken that feedback and the feedback from the customer survey and has come out with a plan to start implementing this feature.

Current State of Deep Learning in ML.NET

Currently, in ML.NET, there isn't a way to create neural networks to have deep learning models from scratch. There is great support for taking an existing deep learning model and using it for predictions, however. If you have a TensorFlow or ONNX model then those can be used in ML.NET to make predictions.

There is also great support for transfer learning in ML.NET. This allows you to take your own data and train it against a pretrained model to give you a model of your own.

However, as mentioned earlier, ML.NET does not yet have the capability to let you create your own deep learning models from scratch. Let's take a look at what the plans are for this.

Future Deep Learning Plans

In the ML.NET GitHub repo there is an issue that was fairly recently created that goes over the plans to implement creating deep learning models in ML.NET.

There are two reasons for this:

  1. Communicate to the community about what the plans are and that this is being worked on.
  2. Get feedback from the community on the current plan.

While we'll touch on the main points in the issue in this post, I would highly encourage you to go through it and give any feedback or questions about the plans you may have to help the ML.NET team in their planning or implementation.

The issue details three parts in order to deliver creating deep learning models in ML.NET:

  1. Make consuming of ONNX models easier
  2. Support TorchSharp and make it production ready
  3. Create an API in ML.NET to support TorchSharp

Let's go into each of these in more detail.

Easier Use of ONNX Models

While you can currently use ONNX models in ML.NET right now, you do have to know the input and output names in order to use it. Right now we rely on the Netron application to load the ONNX models to give us the input and output names. While this isn't bad, the team wants to expose an internal way to get these instead of having to rely on a separate application.

Of course, along with the new way to get the input and output names for ONNX models, the documentation will definitely be updated to reflect this. I believe, not only documentation, but examples would follow to show how to do this.

Supporting TorchSharp

TorchSharp is the heart of how ML.NET will implement deep learning. Similar to how Tensorfow.NET supports scoring TensorFlow models in ML.NET, this will provide access to the PyTorch library in Python. PyTorch is starting to lead the way in building deep learning models in research and in industry so it makes sense to implmement in ML.NET.

In fact, one of the popular libraries to build deep learning models is FastAI. Not only is FastAI one of the best courses to take when learning deep learning, but the Python library is one of the best in terms of building deep learning models. Under the hood, though, FastAI uses PyTorch to actually build the models that it produces. This isn't by accident. The FastAI developers decided that PyTorch was the way to go for this.

TensorFlow is great to support for predicting existing models, but for building new ones from scratch I really think PyTorch and TorchSharp is the preferred way. To do this, TorchSharp will help ML.NET lead the way.

Implementing TorchSharp into ML.NET

The final stage is, once TorchShap has been made production ready, create a high-level API in ML.NET to train deep learning models from scratch.

This will be like when Keras came along for TensorFlow. It was an API on top of TensorFlow to help make building the models much easier. I believe ML.NET can do that for TorchSharp.

This will probably be a big undertaking but definitely worth doing. This will be the API people will use to build their models so taking the time to get this the best way possible. will be worth it in the long run to let us build our models the most trivial way possible which will make us more productive in the long run.

Conclusion

Creating deep learning models from scratch is, by far, one of the most requested features for ML.NET and their plan to do this is definitely going to reach this goal. In fact, I think it will surpass this goal since it will use PyTorch on the backend which is where research and the industry is leaning towards.

If you have any feedback or questions, definitely feel free to comment on the GitHub issue.

What's New in ML.NET Version 1.6

Another new release of ML.NET is now out! The release notes for version 1.6 has all the details, but this post will highlight all of the more interesting updates from this version. I'll also include the pull request for each item in case you want to see more details on it or learn how something was implemented.

There were a lot of things added to this release, but they did make a note that there are no breaking changes from everything that was added.

For the video version of this post, check below.

Support for ARM

Perhaps the most exciting part of this update is the new support for ARM architectures. This will allow for most training and inference in ML.NET.

Why is this update useful? Well, ARM architectures are almost everywhere. As mentioned in the June update blog post this ARM architectures are included on mobile and embedded devices. This can open up a whole world of opportunities for ML.NET for mobile phones and IoT devices.

DataFrame Updates

The DataFrame API is probably one of the more exciting packages that's currently in the early stages. Why? Well, .NET doesn't have much in terms of competing with pandas in Python for data analysis or data wrangling to handle some preprocessing that you may need before you send the data into ML.NET to make a model.

Why am I including DataFrame updates in a ML.NET update? Well, the DataFrame API has been moved into the ML.NET repository! The code used to be in the CoreFx Lab repository as an experimental package, but now it's no longer experimental and now part of ML.NET. This is great news since it is planned to have many more updates to this API.

Other DataFrame updates include:

  • GroupBy operation extended - While the DataFrame API already had a GroupBy operation, this update adds new property groupings and makes it act more like LINQ's GroupBy operation.
  • Improved CSV parsing - Implemented the TextFieldParser that can be used when loading a CSV file. This allows the handling of quotes in columns.
  • ConvertIDataViewtoDataFrame - We've already had a way to convert a DataFrame object into an IDataView to be able to use data loaded with the DataFrame API into ML.NET, but now we can do the opposite where we can load data in ML.NET and convert it into a DataFrame object to perform further analysis on it.
  • Improved DateTime parsing - This allows for better parsing of date time data.
  • Improvements to the Sort and Merge methods - These updates allow for better handling of null fields when performing a sort or merge.

By the way, if you're looking for a way to help contribute to the ML.NET repository, helping with the DataFrame API is a great way to get involved. They have quite a few issues already that you can take a look at and help out with. It would be awesome if we got this package on par with pandas to help make C# a great ecosystem to perform data analysis.

You can use the Microsoft.Data.Analysis label on the issues to filter them out so you can see what all they need help with.

Code Enhancements

Quite a few of the enhancement updates were code quality updates. In fact, feiyun0112 did several pull requests that improved the code quality of the repo helping to make it easier for folks to read and maintain it.

Miscellaneous Updates

There were also quite a lot of updates that didn't really tie in to a single theme. Here are some of the more interesting ones.

These are just a few of the changes in this release. Version 1.6 has a lot of stuff in it so I encourage you to go through the full release notes to see all the items that I didn't include in this post.


What was your favorite update in this release? Was it ARM support or the new DataFrame enhancements? Let me know in the comments!

What's New in the Model Builder Preview

The ML.NET graphical tool, Model Builder, continues to get better and better for everyone to work with and, most important, for everyone to get into machine learning. Recently, there have been some really good additions to Model Builder that we will go over in this post. We will go through the entire flow for Model Builder and will highlight each of the new items.

If you prefer to see a video of these updates, check the video below.

The team is testing out these new preview items so it currently needs to be opt-in through this Microsoft form in order to participate in it. Once you sign up there you will receive an email with instructions on how to install the preview version.

For even more information about this version of Model Builder and ML.NET version 1.5.5, checkout this Microsoft blog post.

The data for this post will be this NASA Asteroids Classification dataset. We will use this to determine if an asteroid can be potentially hazardous or not. That is, if it would come close to Earth enough to be a threat.

Perhaps the biggest addition to the preview version is the new Model Builder config file. Let's look at this being used in action.

Once you have the preview version installed perform the same steps as usual to bring up Model Builder by right clicking on a project and selecting Add -> Machine Learning. It will now bring up a dialog for your Model Builder project.

post1-1.png

Here we can give our Model Builder project a name. We'll name it Asteroids and click to continue. Now the regular Model Builder window shows up, but if you look at the Solution explorer there was a new file added. It was that mbconfig file. We will look at what's in this file later.

We can use Model Builder like usual through the first couple of steps. We'll choose the Classification scenario and will train this locally. Then, we'll add the file and this may take a few seconds since there's a lot of data in here.

Once it's loaded we can specify the label column, which will be the "Hazardous" column at the end.

Let's now explore our updated data options that we get with this preview version. To get there, select the "Advanced data options" link below where you choose where the data is located. This opens a new dialog that shows how we can update the data options. These will be auto-filled based on what Model Builder determines from the data. If you want to override them, these options are available.

Note that there's a small bug in the current version for dark theme of Visual Studio. I have created an issue to let the team know about it. For this section, I'll use the light theme.

post1-2.png

The first section, after the column names, is what purpose the column is. Is it a feature or a label? If it's neither we can select to ignore the column.

post1-3.png

The second section is what data type the column is. You can choose either a string, single (or float), or boolean.

post1-4.png

The last section is a checkbox to tell Model Builder if this column is a categorical feature, meaning that there are a distinct number of string entries in there. Model Builder already determined that the "Orbiting body" column is categorical.

post1-5.png

Also, notice that we can filter out the columns with the text field on the upper right. So if I wanted to see all the columns with "orbit" in the name I can just type that in and it will filter them out for me. This is definitely helpful for datasets that have a lot of features.

post1-6.png

Compare this to what we had in the previous version. These new options give you the same thing, but they are now simpler and show more within the dialog.

post1-7.png

The data formatting options haven't changed, though. That's where you can specify if the data has a header row, what the delimiter is, or specify if the decimals in the file use a dot (.) or a comma (,).

Now we can train our model. I'll set the train time to be 20 seconds and fire it off to see how it goes.

Our top five models actually look pretty good. The top trainer has micro and macro accuracies at around 99%!

|                                 Top 5 models explored                                   |
-------------------------------------------------------------------------------------------
|     Trainer                          MicroAccuracy  MacroAccuracy  Duration #Iteration  |
|11   FastForestOva                      0.9980         0.9988       1.0         11       |
|12   FastTreeOva                        0.9960         0.9882       0.9         12       |
|9    FastTreeOva                        0.9960         0.9882       0.8          9       |
|0    FastTreeOva                        0.9960         0.9882       2.0          0       |
|10   LinearSvmOva                       0.9177         0.8709       2.5         10       |
-------------------------------------------------------------------------------------------

Let's now go straight to the consume step. There's a bit more information here than the previous version.

post1-8.png

Here they give you the option to add consuming the model as projects within your current solution. Keep a watch on this page, though, as I'm sure more options will be coming. They also give you some sample data in which you can use to help test the consumption of your model.

Now, let's take a moment and look again at our mbconfig file. In fact, you will notice a couple of more files here.

post1-9.png

There are now consumption and training files that we can look at. These files are similar to the training and consuming projects that would get added to your solution but you don't have to add them as separate projects if you don't want.

By the way, if for any reason, we need to close the dialog and come back to it at another time to change the data options or increase the time to run we can double click on the mbconfig file to bring it back. This not only brings back the Model Builder dialog, but it also retains the state of it so we don't have to do it all over again.

The reason for that is, if we open the mbconfig file in a JSON editor, it keeps track of everything in this file.

post1-10.png

This keeps track of everything, even the history of all of the runs within Model Builder! And, since this is a JSON file, we can keep this in version control so teams can work on this together to get the best model they can.


Hopefully, this showed how much the team has done to help improve Model Builder. Definitely give feedback on their GitHub issues page for any issues or feature requests.

How to Build the ML.NET Repository

Have you wanted to contribute a bug fix or a new feature to the ML.NET repository? The first step is to pull down the repository from GitHub and get it built successfully so you can start making changes.

The ML.NET repository has great documentation. Part of it is how to build it locally from this doc. In this post, we'll go over the steps to do this so you can do the same and get started making changes to the ML.NET repository.

For a video version of this post, check below.

Fork the Repository

The first thing to do, if you haven't already, is to fork the ML.NET repository.

image (1).png

If you haven't forked the repository yet, you're good to go to the next step. However, for me, since I have already forked the repository a while back, I need to make sure I have the latest.

There are two ways to do sync up my fork with the main repository - running git commands or letting GitHub do it for you.

Syncing the Fork

We can run some git commands to sync up. GitHub has good documentation on how to do this for a more detailed explanation.

The first thing is to is to make sure you have an upstream remote set up to point to the main repository.

To check if you have it you can run the git remote -v command. If there is only an origin remote then you would need to add an upstream remote that points to the original repository.

image (2).png

If you don't have it set, this can be set with the following command.

git remote add upstream git@github.com:dotnet/machinelearning.git

Note that I have SSH set up so I use the SSH clone link. If you don't have this set up you can use the HTTPS link instead.

After setting the upstream remote, we need to get the latest from the

git fetch upstream

Once the upstream fetched we can merge those changes into our fork. Make sure you’re in the default branch and run this command to merge in the changes.

git merge upstream/main

Now you can start working on the latest code base.

Note here that I attempted to use GitHub to sync my fork. Unfortunately, it seems to not do as good of a job as the git commands.

Install Dependencies

Before we can start to build the code, there is a dependency we need to install. This dependency is included with a git submodule.

If you run the build before this step you will get errors, so it's best to do this before running the build.

To install the submodule dependencies, run the below command.

git submodule update --init

With the submodules installed we can now run the build through the command line.

Build on the Command Line

The build command is made very well in the ML.NET repository so there's very little you have to do to actually run it. We can run this on the command line. The script you run will depend on if you use Windows or Linux/Mac.

For Windows, you would run build.cmd and for Mac/Linux you would run build.sh.

The first time you run it will take a while. It needs to download several assets, such as NuGet packages and models for testing. After you download all of this, though, subsequent builds will go much faster.

Build in Visual Studio

With the main build now complete we can now build within Visual Studio. Although, currently, you may get an error in the Microsoft.ML.Samples.GPU project.

image (3).png

Why do we get this error in Visual Studio and not when we ran the build on the command line? It turns out that Visual Studio was set to have compile errors on warnings. There are a couple of things you can do to fix this.

First, since this is a samples project, the simplest thing is to just comment out the method. Instead of doing that, though, we can update the build properties of the project. We can either set the "treat warnings as errors" to "None".

image (4).png

Or, we can update the "Suppress warnings" to specify this specific warning. To get the warning we can go back and highlight the error with our cursor which will bring up a tooltip describing the error. It has a link to the CS0618 warning. We can put in the number in the "suppress warnings" section, 0618, and save the project.

image (5).png

Now we can fully build the solution in Visual Studio. Although, take note about this change when committing any other changes. You can either not include this change or include it and make a comment to discuss with the ML.NET team about it.


Hopefully, this post helps you get started to contribute to the ML.NET repository. If you make a contribution to the ML.NET repository, please let me know and we can celebrate!


ML.NET Predictions on the Web in F# with the SAFE Stack

Building web sites in C# has be something that you could do for quitea while. But, did you know that you can do web sites in F#? Enter the SAFE Stack. An all-in-one framework that allows you to use F# on the server, but also allows you to use F# on the client side. That's right, no more JavaScript for the client side!

For a video version of this post, checkout the video below.

Introduction to the SAFE Stack

The SAFE Stack is built on top of these components:

  • Saturn
  • Azure
  • Fable
  • Elmish

Let's go into each of these in a bit more detail.

Saturn

Saturn is a backend framework built in F#. Saturn privides several parts to help us build web applications, such as the application lifecycle, a router, controllers, and views.

Azure

Azure is Microsoft's cloud platform. This is mostly used for hosting our website and any other cloud resources that we may need, such as Azure Blob Storage for files or Azure Event Hub for real time streaming data.

Fable

Fable is a JavaScript compiler. Similar to how TypeScript compiles into JavaScript, Fable does the same, except that you write F# and it compiles into JavaScript.

Elmish

The Elmish concept builds on top of Fable to provide a model-view-update pattern that is popularized in the Elm programming language.

Creating a Project

The best way to create a SAFE Stack project is to follow the steps in the documentation, but I'll highlight them here. By the way, their documentation is great!

There is a .NET template created to make creating a SAFE project much easier than manually putting it together.

To install the template, run the below command.

dotnet new -i SAFE.Template

1.png

Once the template is installed, make a new directory to keep the project files.

mkdir MLNET_SAFE

Then, you can use the .NET CLI to create a new project from the template with another command and specify the name of the project.

dotnet new SAFE -n MLNET_SAFE

Once that finishes, run the command to restore the tools used for the project. Specifically, the FAKE tool, which is used to build and run the project.

dotnet tool restore

2.png

With that done we can now run the app! To do that run the FAKE command with the run target.

dotnet fake build --target run

3.png

This is going to perform the following steps (which can be found in the build.fsx file):

  • Clean the solution
  • Run npm install to install client side dependencies
  • Compiles the projects
  • Run the projects in watch mode

When that completes, you can navigate to http://localhost:8080. We now have a running instance of the SAFE Stack!

4.png

The template is a todo app which helps show different aspects of the SAFE Stack. Feel free to explore the app and the code before continuing.

Adding ML.NET

The Model

For the ML.NET model, I'll be using the salary model that was created in the below video. It's a simple model with a small dataset to go over more of the F# and ML.NET nuances than working with the data itself.

In the Server project, add a new folder called "MLModel". In there, we can add the model file that was generated from the above video. We would also need to update the properties on the file to allow it to output during build.

Note that this can easily be in Azure Blob Storage instead and use the SDK to retrieve and download it from there.

5.png

Next, for the Server and Shared projects, add the Microsoft.ML NuGet packge. At this time, it's at version 1.5.4.

6.png

Updating the Shared File

Now we can update the file in the Shared project. We can put types and methods in this file that we know will be used in more than one other project. For our case, we can use the model input and output schemas.

type SalaryInput = {
    YearsExperience: float32
    Salary: float32
}

[<CLIMutable>]
type SalaryPrediction = {
    [<ColumnName("Score")>]
    PredictedSalary: float32
}

The SalaryInput class has two properties that are both of type float32. The SalaryPrediction class is special where we need to put the CLIMutable attribute on it. That has one property that's also of type float32. This property has the ColumnName attribute on it to map to the output column from the ML.NET model.

There's one other type we can add to our shared file. We can create an interface that has a method to get our predictions that can be called from the client to the server.

type ISalaryPrediction = { getSalaryPrediction: float32 -> Async<string> }

In this type, we create a method signature called getSalaryPrediction which takes in a paramter of type float32 and it returns a type of Async of string. So this method is asynchornous and will return a string result.

Updating the Server

Next, we can update our server file. This file contains the code to run the web server and any other methods that we may need to call from the client.

To run the web app you have the following code:

let webApp =
    Remoting.createApi()
    |> Remoting.withRouteBuilder Route.builder
    |> Remoting.fromValue predictionApi
    |> Remoting.buildHttpHandler

let app =
    application {
        url "http://0.0.0.0:8085"
        use_router webApp
        memory_cache
        use_static "public"
        use_gzip
    }

run app

The app variable creates an application instance and sets some properties of the web app, such as what the URL is, what router to use, and to use GZip compression. You can also add items such as using OAuth, set logging, or enable CORS.

The webApp variable creates the API and builds the routing. Both of these are based on the predictionApi variable which is based off the ISalaryPrediction type we defined in the shared file.

let predictionApi = { getSalaryPrediction =
    fun yearsOfExperience -> async {
        let prediction = prediction.PredictSalary yearsOfExperience
        match prediction with
        | p when p.PredictedSalary > 0.0f -> return p.PredictedSalary.ToString("C")
        | _ -> return "0"
    } }

The API has the one method we defined in the interface - getSalaryPrediction. This is where we implement that interface method. It takes in a variable, yearsOfExperience, and it runs an async method defined by the async keyword. In the brackets is what it should run.

All we are running in there is to use a prediction variable to call the PredictSalary method on it and pass in the years of experience variable to it. With the value from that we do a match expression and if the PredictedSalary property is greater than 0 we return that property formatted as a currency. If it is 0 or below, we just return the string "0".

But where did the prediction variable come from? Just above the API implementation, a new Prediction type is created.

type Prediction () =
    let context = MLContext()

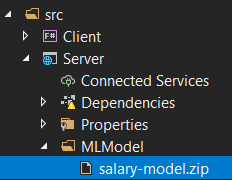
    let (model, _) = context.Model.Load("./MLModel/salary-model.zip")

    let predictionEngine = context.Model.CreatePredictionEngine<SalaryInput, SalaryPrediction>(model)

    member __.PredictSalary yearsOfExperience =
        let predictedSalary = predictionEngine.Predict { YearsExperience = yearsOfExperience; Salary = 0.0f }

        predictedSalary

This creates the instance of the MLContext. It also loads in the model file, and creates a PredictionEngine instance from the model. Remember the SalaryInput and SalaryPrediction types are from the shared project. And notice that, when we load from the model, it returns a tuple. The first value returns the model whereas the second value returns the DataViewSchema. Since we don't need the DataViewSchema in our case, we can ignore it using an underscore (_) for that variable.

This type also creates a member method called PredictSalary. This is where we call the predictionEngine.Predict method and give it an instance of SalaryInput. Because F# is really good at inferring types, we can just give it the YearsExperience property and it knows that it is the SalaryInput type. We do need to supply the Salary property as well, but we can just set that to 0.0. Then, we return the predicted salary from this method. In F# we don't need to specify the return keyword. It automatically returns if it's the last item in the method.

Updating the Client

With the server updated to do what we need, we can now update the client to use the new information. Everything we need to update will be in the Index.fs file.

There are a few Todo items that it's trying to use here from the Shared project. We'll have to update these to use our new types.

First, we have the Model type. This is the state of our client side information. For the Todo application, it has two properties, Todos and Input. The Input property is the current input in the text box and the Todos property are the currently displayed Todos. So to update this we can change the Todos property to be PredictedSalary to indicate the currently predicted salary from the input of the years of experience. This property would need to be of type string.

type Model =
    { Input: string
      PredictedSalary: string }

The next part to update is the Msg type. This represents the different events that can update the state of your application. For todos, that can be adding a new todo or getting all of the todos. For our application we will keep the SetInput message to get the value of our input text box. We will remove the others and add two - PredictSalary and PredictedSalary. The PredictSalary message will initiate the call to the server to get the predicted salary from our model, and the PredictedSalary message will initiate when we got a new salary from the model so we can update our UI.

type Msg =
    | SetInput of string
    | PredictSalary
    | PredictedSalary of string

For the todosApi we simply rename it to predictionApi and change it to use the ISalaryPrediction instead of the ITodosApi.

let predictionApi =
    Remoting.createApi()
    |> Remoting.withRouteBuilder Route.builder
    |> Remoting.buildProxy<ISalaryPrediction>

The init method can be updated to use our updated model. So instead of having an array of Todos we just have a string of PredictedSalary.

let init(): Model * Cmd<Msg> =
    let model =
        { Input = ""
          PredictedSalary = "" }
    model, Cmd.none

Next, we update the update method. This takes in a message and will perform the work depending on what the message is. For the Todos app, if the message comes in as AddTodo it will then call the todosApi.addTodo method to add the todo to the in-memory storage. In our app, we will keep the SetInput message and add two more to match what we added in our Msg type from above. The PredictSalary message will convert the input from a string to a float32 and pass that into the predictionApi.getSalaryPrediction method. The PredictedSalary message will then update our current model with the new salary.

let update (msg: Msg) (model: Model): Model * Cmd<Msg> =
    match msg with
    | SetInput value ->
        { model with Input = value }, Cmd.none
    | PredictSalary ->
        let salary = float32 model.Input
        let cmd = Cmd.OfAsync.perform predictionApi.getSalaryPrediction salary PredictedSalary
        { model with Input = "" }, cmd
    | PredictedSalary newSalary ->
        { model with PredictedSalary = newSalary }, Cmd.none

The last thing to update here is in the containerBox method. This builds up the UI. You may have already noticed that there is no HTML in our solution anywhere. That's because Fable is using React behind the scenes and we are able to write the HTML in F#. We'll keep the majority of the UI so there's only a few items to update. The content is what's currently holding the list of todos in the current app. For our case, however, we want it to show the predicted salary so we'll remove the ordered list and replace it with the below div. This sets a label and, if the model.PredictedSalary is empty it doesn't display anything. But if it isn't empty it does a formatted string containg the predicted salary.

div [ ] [ label [ ] [ if not (System.String.IsNullOrWhiteSpace model.PredictedSalary) then sprintf "Predicted salary: %s" model.PredictedSalary |> str ]]

Next, we just need to update the placeholder in the text box to match what we would like the user to do.

Control.p [ Control.IsExpanded ] [
                Input.text [
                  Input.Value model.Input
                  Input.Placeholder "How many years of experience?"
                  Input.OnChange (fun x -> SetInput x.Value |> dispatch) ]
            ]

And with the button we just need to tell it to dispatch, or fire off a message, to the PredictSalary message.

Button.a [
   Button.Color IsPrimary
   Button.OnClick (fun _ -> dispatch PredictSalary)
]

With all of those updates we can now run the app again to see how it goes.


Being able to use F# for the client as well as the server is a great way for F# developers to not only build web applications without having to use JavaScript and any of their frameworks, but also so they can utilize their functional programming knowledge to reduce bugs in the code.

If I were building web apps for personal or freelance work, I'll definitely give the SAFE Stack a try. I believe my productivity and efficiency of building the web applications will be much better with it.

To learn more (there is a good bit to learn since we're not only using functional patterns in a web application, we are also using the model view update pattern for the UI) I highly recommend the Elmish documentation and Elmish book by Zaid Ajaj. I'll be referencing these a lot in the days to come.